Layer List
The Layer List contains all layers on the current page. Here you can view each layer’s attributes, such as whether it’s hidden or locked, as well as being able to organize your document by renaming and reordering layers.
Multiple Pages
Sketch enables you to use multiple Pages in your designs and you can switch between them via the pop-up menu above the Layer List (you can also use the Function-Up Arrow / Function-Down Arrow shortcuts). The Layer List will display the layers of the current page only.
If you want to organize or move layers between pages, just reveal the Pages pane:
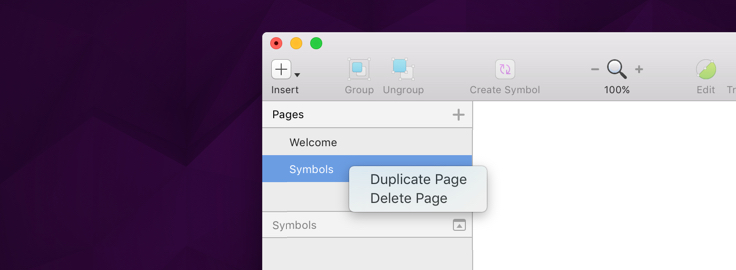
Click the add button to insert a new Page. Control-click a Page to reveal a shortcut menu to duplicate or delete a Page:

You can drag layers and Artboards from one Page to another, and can duplicate them by holding the Option key:
Artboards
Artboards in the Layer List are displayed with a lighter color than other layers. These layers are at the top of the hierarchy, and cannot be contained within another Artboard.
Masks
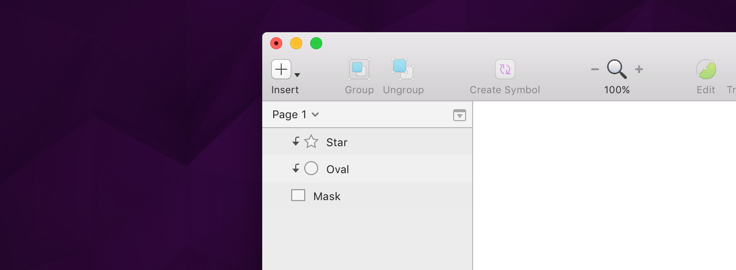
Layers that are masked will appear indented with a little arrow icon before their name and preview. These layers will clip to a layer below that is being used as a mask everything above it. Learn more about how to use masks.

Boolean Operations
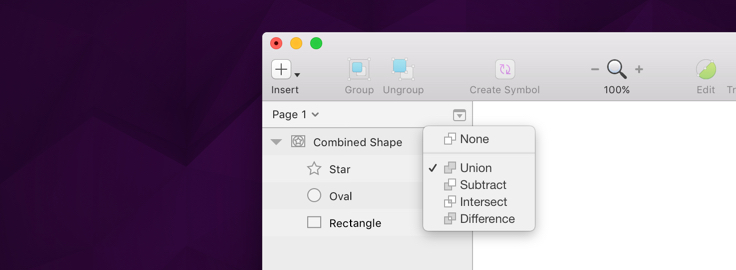
Boolean operations are a set of rules used for combining simple shape layers, into a more complex one. One of these shape layers will have a disclosure triangle next to its preview which will reveal its subpaths, which can be edited and changed at any time. Each subpath will have a boolean operation applied to it, to dictate how it ought to display within the larger shape.
It can be a concept that’s a little tricky to initially understand, so you can find out more about boolean operations here.

Symbols and Shared Styles
Symbols are a group of layers that are intended to be re-used throughout your design. They can appear in the Layer List as instances of a master Symbol. These are flattened layers which can be double-clicked in the Canvas to edit their contents.
Library Symbols are Symbols that belong to an external document, that has been linked via Libraries. Unlike local Symbols, when you double-click to edit their contents, you are offered to edit them in the Library they belong to.
Shared Styles are used to keep layer styles consistent between multiple layers and they can be applied to both shape and text layers. To indicate that a shape or text layer is using a Shared Style, their preview is displayed in a purple color instead of the usual grey.

Hiding and Locking Layers
Any layer or group can be hidden from the Canvas, simply by clicking the eye icon that appears on hover—to the right of the layer name in the Layer List (or press Shift-Command-H). If this eye icon is visible, this indicates that the layer is hidden.
Similarly, when holding down the Option key and hovering the Layer List, a padlock icon will appear instead of the hide icon. When clicked, this will show that the layer is now locked on the Canvas, meaning it cannot be selected or moved without being unlocked first. Selected layers can also be locked by pressing Shift-Command-L.
Filtering Layers
At the bottom of the Layer List sits a bar with a text box and a couple of icons. These controls can be used to filter layers from appearing in the list. To find a certain layer by its name, simply search for it in the Filter text box and the Layer List will update to display your search results.

The two icons that appear next to the text box allow you to filter between regular layers, and slices. If you click on the Filter Layers button , your layers will be hidden from the list, and you won’t be able to interact with them on the Canvas. This is perfect for when you exclusively want to work with slice layers.
Clicking the Filter Slices button however will have the opposite effect: slices will be hidden from the Layer List and the Canvas to ensure they don’t get in your way. The number that appears next to the Filter Slices button indicates the total number of exportable layers (including slices) you have on a Page.
Note: If you find yourself not being able to select any layers on the Canvas, be sure to check the Filter Layers button is blue—indicating that they can be interacted with.
