Editing Shapes
Whenever you draw a new shape or edit an existing one, you are essentially interacting with the points directly, and the lines (called paths) that Sketch draws between those points are what you see on screen. Sometimes the paths between the points are straight lines, and at other times they are can be curved.
Choose Insert › Shapes › Rectangle from the pop-up menu in the toolbar (or press R). Draw it on the Canvas and when done, double-click it to begin editing:
You will see a circular point in each of the corners. Click-and-drag on any of these points to change their position and you will see that the rest of the shape changes accordingly. Points can snap to existing points’ axes. Clicking anywhere on the path between two points will insert a new point which can be moved around independently as well. To delete a point, select it and press the Backspace key on your keyboard.
If you want curved lines instead of straight ones, you can double-click a point. You will see two little handles appear on either side of the point that control the curvature of the path on either side. These are called the handle control points. Think of these handle control points as if they are pulling the path towards themselves.
For an in-depth article about how control points work in Sketch, check Peter Nowell’s excellent Mastering the Bézier Curve in Sketch.
Point Types
There are different ways in which the points limit the movement of their handle control points and, in turn, the kind of paths that are produced between them.
While editing a shape you will see that the Inspector shows you four different types for the point; Straight, Mirrored, Disconnected and Asymmetric.

- Straight: If you apply the first mode on your shape you’ll get no handle control points and a straight line.
- Mirrored: The handle control points will mirror each other and sit an equal distance from the selected point. If a vector point is not straight, this is the default.
- Asymmetric: The control points will appear similar to the Mirrored point mode, but they can appear at an independent distance from the point.
- Disconnected: Control points are completely independent of each other.
Each of these point types can be adjusted in the Touch Bar when a point is selected.

If a point is set to Straight, you can use the slider under this section to turn the straight corner into a rounded one. If you choose Insert › Shape › Rounded Rectangle from the pop-up menu (or press U) you’ll get a basic rectangle with four points where the corner radius has already been set for you.
Being able to control corner radius on a per-point basis allows you to have different radii per corner; you can just round the top two corners and keep the bottom two right-angled, for example:

Keyboard Shortcuts: you can use the number keys 1 to 4 to change the selected point’s type. Hit 1 for Straight, 2 for Mirrored, 3 for Disconnected and 4 for Asymmetric.
Drawing versus Editing
Instead of starting with a predefined shape, you can also draw a shape from scratch by using the Vector tool. Choose Insert › Vector from the pop-up menu in the toolbar and click anywhere on the Canvas to add your first point. Click elsewhere to add the second.
You will see that a path now connects both points. Now when adding a third point, click-and-drag to draw a curve. If you click again on the first point, you’ll close the path.
Selecting other points, inserting new points on paths, and anything else is exactly the same, whether you’re editing an existing shape or drawing a new one.
Closed vs Open
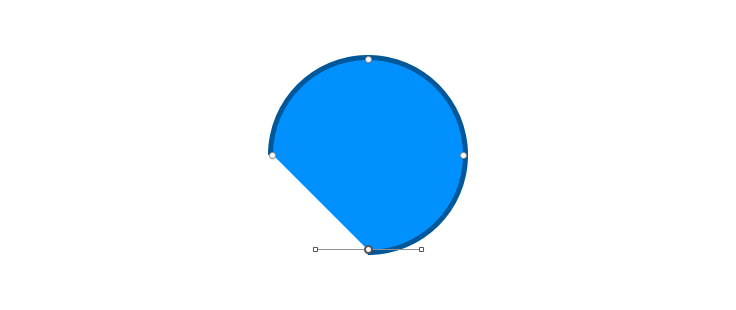
A path can be either closed or open. When it is closed, all the paths between the points will be connected. When a path is open, it leaves a gap between the last point and the first. You can turn a closed path to an open one and vice versa by choosing Layer › Path › Close Path in the menu, or Option-Command-O.
You can click the Finish Editing button, or press the Enter key to leave the editing mode to keep your path open. The next time you edit it, you can continue from where you left off and place your next point from either the first or last drawn point.
Depending on your preferences, when editing an open path and clicking on the opposite end point, you can either close the path, or select the point to allow easy editing. You can change this behaviour by choosing Preferences › Layers, and selecting “Close path when clicking to select the opposite end point”.
Note: whenever you’ve applied a fill to your shape, the fill will draw as if the path was closed—even if the border is drawn with a gap.
Aligning Points
It is possible to use the distribute and align tools at the top of the Inspector when you have multiple points selected. Distribute will ensure three or more points will be an equal distance from each other, whilst align will make sure two or more points line up.
Multiple Selection
Something that may not be immediately obvious is that you can select multiple points and move them all at once. To select multiple points, hold down the Shift key while you click on points. Selected points will appear larger than unselected points.
Another way to select multiple points is to hold down Shift and click-and-drag from an empty area in the view to make a rectangular selection. If you’re still holding down Shift when you release it will extend the selection you had before dragging with the newly selected points. If not, it will deselect the old points and just select the newly selected points.
It is also worth noting that you can edit multiple vector shapes at once. Select any layer that contains subpaths, or select two or more vector shapes and press the Enter key to begin editing. Vector points will become visible for all shapes where you can make your edits at once, without having to individually select each shape to make your changes.
Flattening Layers
The flatten feature is most commonly associated with boolean operations, however it also has its uses when working with individual shape layers.
When you rotate or flip a layer, or adjust additional properties such as corner radius, or the number of points — the Flatten tool will become active. This destructive action will do much the same thing, to confirm the applied transformations.
In the case of a rotated layer, Flatten will set the layer’s rotation value to 0º, whilst working out the total height and width of the layer as a whole. Flattening a rectangle with rounded corners will apply new vector points at the start and ends of the curve, rather than having the point at the corner display a faux path.
Shortcuts
If you hold down the Shift key before inserting in a new point at the end of a path, it will instead align it at a 45º increment from the previous point, ideal for drawing straight lines.
When moving an existing point by clicking-and-dragging, holding down the Shift key will ‘lock’ its axis, in the direction you drag it in. This means that after you move a point, it will remain in the exact X, or Y position that it was before.
If you hold down the Shift key and click on a path between two points, Sketch will insert the point exactly in the middle of the line for you.
Holding down the Option key will display all handle control points within the shape.
When clicking-and-dragging to adjust the handle control points of an Asymmetric point, holding down the Shift key will adjust the distance between the control point, and vector point without affecting the handles’ angle.
Pressing the Tab key will jump between points in the order they were placed.
